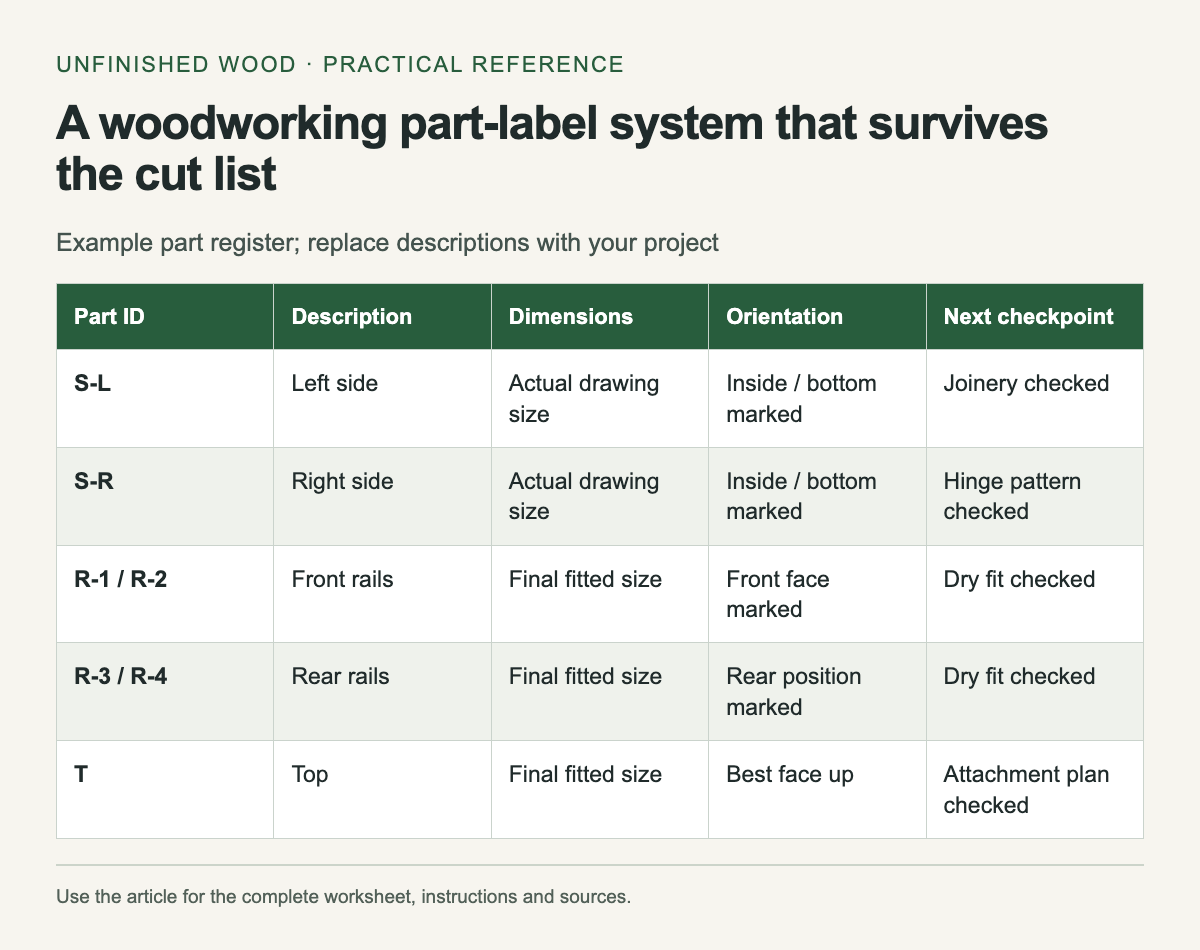
Give every part a short ID before milling begins, then use that ID on the drawing, cut list and workpiece. A stack containing four similar rails is easy to recognize until two become shorter and one receives a hole on the wrong face. Part labels preserve those differences through the build.
A useful ID is simple enough to read from the bench: S-L for left side, S-R for right side, T for top, and R-1 through R-4 for rails. Write a plain description beside each ID on the cut list. Avoid a code so elaborate that you need a separate manual to understand the furniture.
Separate dimensions from identity
Keep the ID stable when a dimension changes. If a rail becomes 5 mm shorter during fitting, revise its length on the register and drawing without renaming it. Date or number the drawing revision and cross out the superseded value clearly. Loose scraps of paper with conflicting dimensions are a poor place to store the final decision.
List finished size and rough size in separate columns. A rough blank may need extra length for checking ends and extra thickness for preparation. Choose those allowances for the actual stock and machining sequence; do not automatically add one universal amount to every part.
For sheet goods, record the face that should show and the grain or surface direction. For solid wood, keep the appearance arrangement visible in a sketch or photograph. The site's existing grain-matching and story-stick guides address those physical references; the register connects them to the named parts.
Mark faces and orientation
Choose one face and one edge as references where the joinery method needs them. Mark top, bottom, inside or front only when that orientation matters. Put the marks where they will remain visible through the next operation and can later be removed or hidden appropriately.
Use pencil or a removable label suitable for the surface. Test adhesive labels before using them on delicate veneer or a finish sample. Keep marks out of glue surfaces, visible finished areas and machine contact zones when they could interfere with the operation. A label must not create a loose piece that can catch in a tool.
When sanding removes an ID, transfer it first to a safe hidden location or a labeled tray. Masking tape can hold a batch identity during storage, but remove it before machining if it could detach. Small parts can travel in a clearly labeled container instead of carrying their own adhesive labels.
Track the next operation
Use status columns for the stages that can change fit: rough cut, final size, joinery, dry fit and finish. Tick a stage only after checking that part. For a pair of rails, measuring one does not confirm the other is identical.
Record exceptions in a short notes column. An example is “R-3: inside face has knot; keep toward rear.” Another is “S-R: hinge holes differ from S-L.” These are hypothetical notes showing the format, not descriptions of a tested project.
Close the loop at assembly
Lay parts out in assembly order and compare them with the drawing. Confirm quantities before opening glue. The Titebond Original technical page gives product-specific assembly times, which illustrates why identification and fit checks belong in the dry run.
Keep the final register with the furniture plan. Record any changes made during assembly and the finish product used. If a drawer front or shelf needs replacing later, the saved ID and final dimensions are more useful than the original shopping list.
Settle the visible arrangement with the grain-matching layout before assigning final position labels to the boards.
| Part ID | Description | Dimensions | Orientation | Next checkpoint |
|---|---|---|---|---|
| S-L | Left side | Actual drawing size | Inside / bottom marked | Joinery checked |
| S-R | Right side | Actual drawing size | Inside / bottom marked | Hinge pattern checked |
| R-1 / R-2 | Front rails | Final fitted size | Front face marked | Dry fit checked |
| R-3 / R-4 | Rear rails | Final fitted size | Rear position marked | Dry fit checked |
| T | Top | Final fitted size | Best face up | Attachment plan checked |
Related workshop guides
- Grain matching: arrange panels and fronts before the first cut
- Make a story stick for a project with repeated dimensions
- The ten-minute dry run that makes a glue-up calmer
Comments
Post a Comment