An independent woodworking journalMake something worth keeping.
Good wood.
Useful knowledge.
A little patience.
The Wood Journal

Router Bit Shank Sizes: 6 mm vs 1/4 Inch

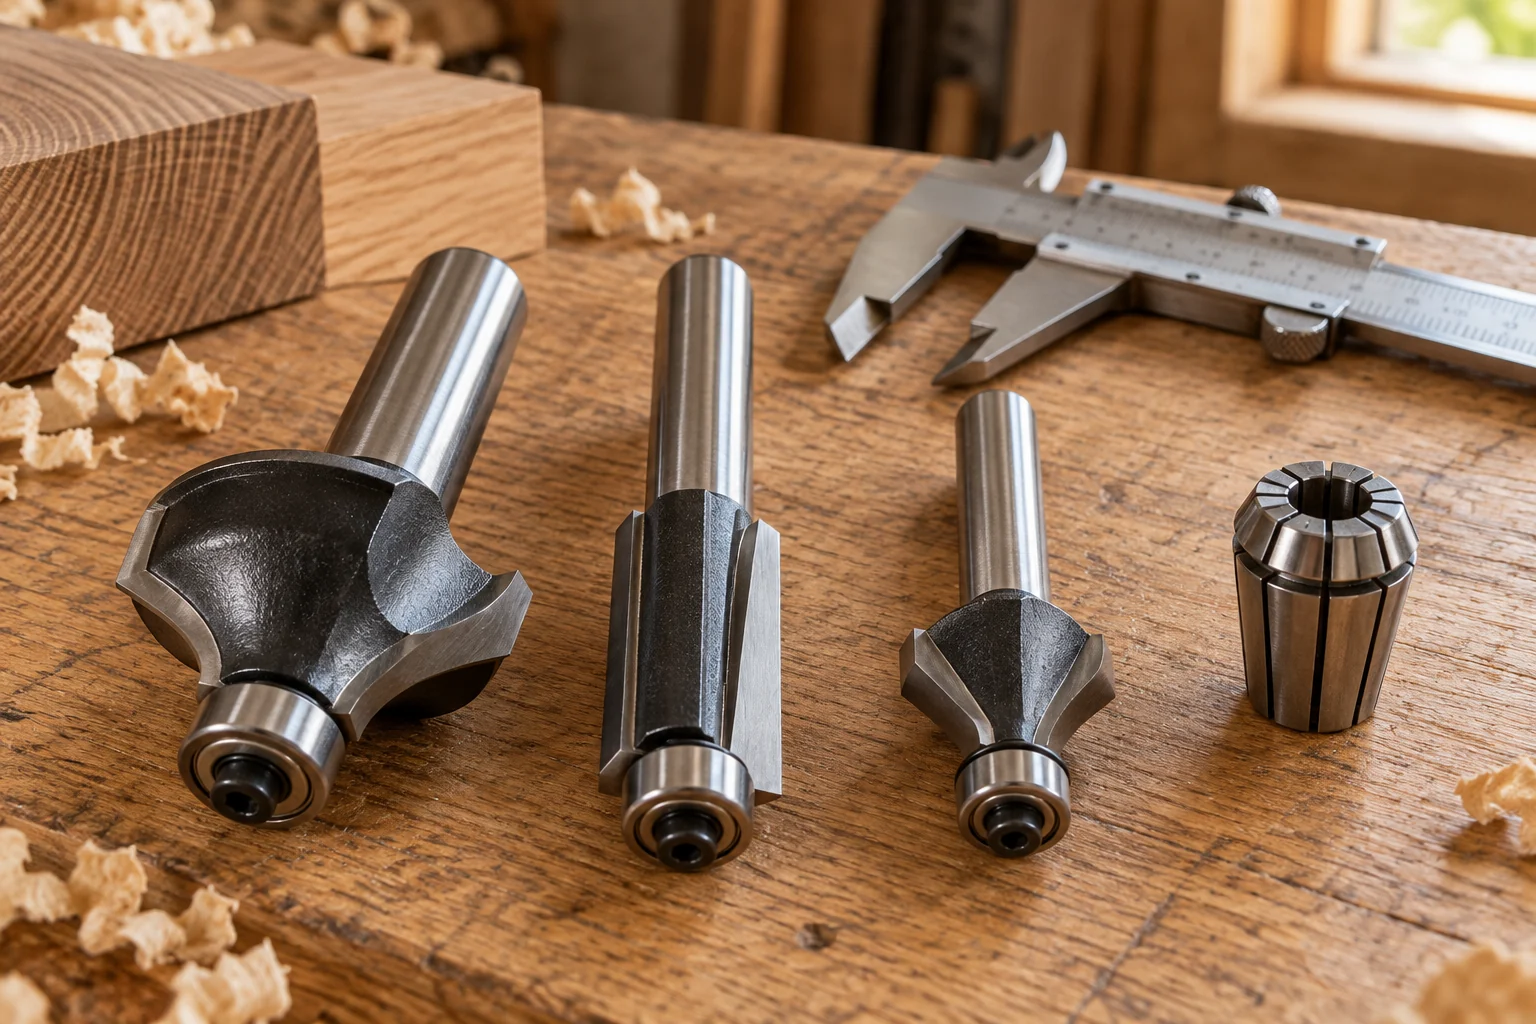
Illustration of router bits with different shank sizes and a separate collet

A 6 mm router bit shank and a 1/4 inch shank are different sizes. One quarter inch is 6.35 mm. That 0.35 mm difference is small on a ruler and large enough to matter in a precision clamping connection. Match the bit shank to a collet explicitly specified for it.

The same problem appears with 12 mm and 1/2 inch. Half an inch is 12.7 mm. A measurement that looks close is not a compatibility statement. Do not force a bit into a smaller collet or try to compensate for a loose fit by tightening harder.
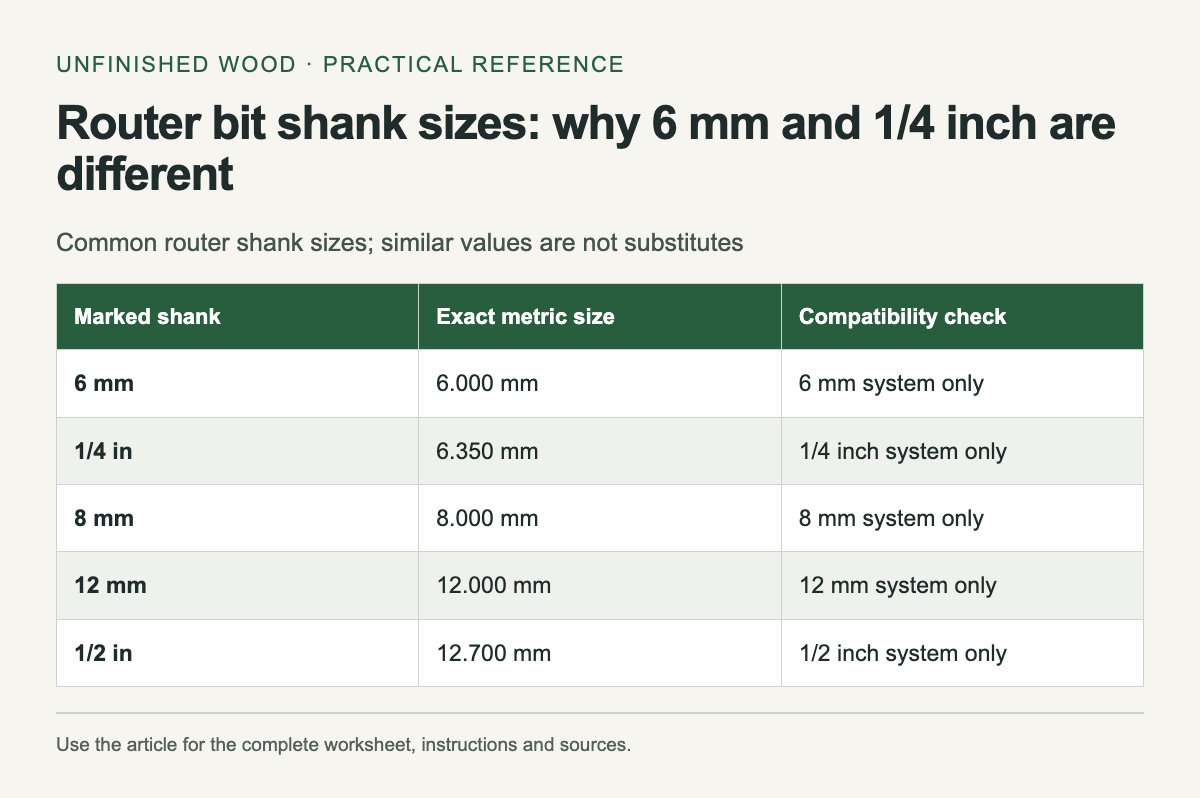
Common router shank sizes; similar values are not substitutes. The complete instructions and accessible tool follow in the article.
Reference graphic from this guide. The complete instructions and tool, where available, remain in the article.

Identify the router before the bit

Find the router's model number and manual. Check which collets and any manufacturer-approved reducing sleeves it supports. A collet from another router may have the same nominal bore while using a different taper, nut or length. Those external dimensions are part of the system.

Trend's 6 mm T4 collet, for example, is identified by both its bore size and the intended router family. That is the level of identification to look for when ordering a replacement. Keep the model reference with the collet so an unlabeled spare does not return to the drawer as a mystery part.

Read markings on the bit packaging and shank. If markings are missing, measure the clean straight shank with a suitable caliper and ask the manufacturer to identify it when uncertainty remains. Measurement can reveal an obvious mismatch; it cannot certify an unknown or damaged cutter for use.

Separate three different sizes

The cutting diameter determines the shape or width of the cut. The shank diameter determines the collet fit. The overall cutter length affects reach, clearance and safe use. A large cutting diameter does not imply a half-inch shank, and a long bit should not be used to solve a reach problem without checking the tool's limitations.

The table converts common nominal shank sizes. It deliberately does not group similar values into interchangeable pairs. Convert dimensions with 25.4 mm per inch, then select the exact supported size. Keep metric and imperial bits in labeled storage positions if you own both systems.

Inspect and install according to the manual

Disconnect power before changing the bit. Inspect the collet, nut and shank for damage, corrosion and contamination. Follow the router and cutter instructions for insertion depth, withdrawal from the bottom if required, tightening and speed limits. Generic advice about how far to insert a bit cannot replace a manufacturer's minimum insertion mark or model-specific procedure.

Do not make improvised shims from tape or sheet metal. Use only reducing components approved for that router and application. If a collet no longer grips correctly, stop using it and obtain the correct replacement rather than experimenting under power.

Record compatibility once

Make a small inventory with router model, approved collet part number, bore size and matching bit storage row. Photograph the relevant label for your own records. When borrowing a bit, check its shank before setting up the cut.

After installation, check guard, base opening, workholding and cutter clearance with the tool disconnected, following the manual. A correct shank fit answers only one part of the setup. The cutting diameter, material, speed and permitted cutting method still need to match the job.

Once the bit and collet are confirmed compatible, a shelf project still needs a separate check of dado width against the actual plywood.

Common router shank sizes; similar values are not substitutes
Marked shankExact metric sizeCompatibility check
6 mm6.000 mm6 mm system only
1/4 in6.350 mm1/4 inch system only
8 mm8.000 mm8 mm system only
12 mm12.000 mm12 mm system only
1/2 in12.700 mm1/2 inch system only

Related workshop guides

Sources

Owen Mercer
Tools & workshop practice

Owen Mercer

Workshop notes on hand tools, joinery, jigs and the small habits that make a project easier.

Comments

Popular posts from this blog

Lumber Grades At A Glance

Illustrative AI-generated image. Domestic hardwood lumber found at sawmills meets different quality levels or grades as specified by the National Hardwood Lumber Association (NHLA). The basis for this wood grading is the number and size of defect-free clear cuttings in a board, as summarized below, Thickness is not a consideration, though with some species worm holes, gum pockets, and stain are acceptable. FAS (First & Seconds) lumber grade. This premium grade represents the finest lumber yield in a log. Generally, the minimum size board is 6" wide by 8' long which yields a minimum of 83 1/3% clear cuttings on its poorest face. F1F (FAS One Face) lumber grade. The best face grades as clear FAS; the worst, as #1 common, containing some knots. Selects lumber grade. Close to a FAS board. A Select board must be a minimum of 4" wide and 6' long and yield a minimum of 83 1/3% clear cuttings, but only on one face with #1 common on the worst face. #...

How to buy Sawmill Hardwood and Save (Part 1)

Illustrative AI-generated image. When you visit a home center to purchase hardwood lumber, more than likely you'll encounter limited quantities, limited species, and through-the-roof pricing. In some cases, you're paying for that shiny cellophane wrapper. Before you sell your tools and steer toward a different hobby, you need to check out the benefits of shopping at a lumber sawmill. While some mills service only the commercial building industry. make pallets, or ship woods overseas, many gladly sell to the local woodworker. Here is where you'll find great variety and huge savings. If the special lingo and ways in which sawmills sell hardwood have kept you at bay, let us help you shop like a pro. First things first: finding a sawmill. While your local yellow pages will yield results when you look under "Sawmills” or “Lumber-Retail," members of 10 cal woodworking clubs, woodworking friends, or woodworking specialty stores may serve as better sources for locati...

4-Step Antique Finish

Create a fool-the-eye timeworn look. Some projects, like wine server for your wood cabinet, are not unlike a pair of blue jeans, Both look better after a few years of regular use. To create that well-worn look wood finish, I have come up with a finishing schedule that can add a century's worth of character in less time than it would take to stonewash a new pair of Levis. At first glance, this four-step finish might appear demanding, bur keep reading. As you'll soon learn, this special finish amounts to little more than a combination of a few basic techniques you've probably used before. The “pickling" and - “highlighting” I use aren't much different than whitewashing a fence. Simply brush on the color and then wipe some off until it looks good to you. And after each step you'll apply a quick-drying seal coat to save your work. Besides providing an additional decorative element to your work, antiquing has some practical advantages. Adding color to t...

It starts with
a piece of wood.

Unfinished Wood is a collection of practical ideas for the workshop: choosing your materials, solving small problems, and bringing out the character in what you make.

The journal voices

Owen Mercer
Tools & workshop practice

Owen Mercer

Workshop notes on hand tools, joinery, jigs and the small habits that make a project easier.

Ben Harlow
Wood & materials

Ben Harlow

Practical guides to choosing lumber, understanding grain and planning for wood movement.

Daniel Reed
Surface & finish

Daniel Reed

Notes on sanding, test samples, color and finishes that let the character of the wood show through.

Search This Blog