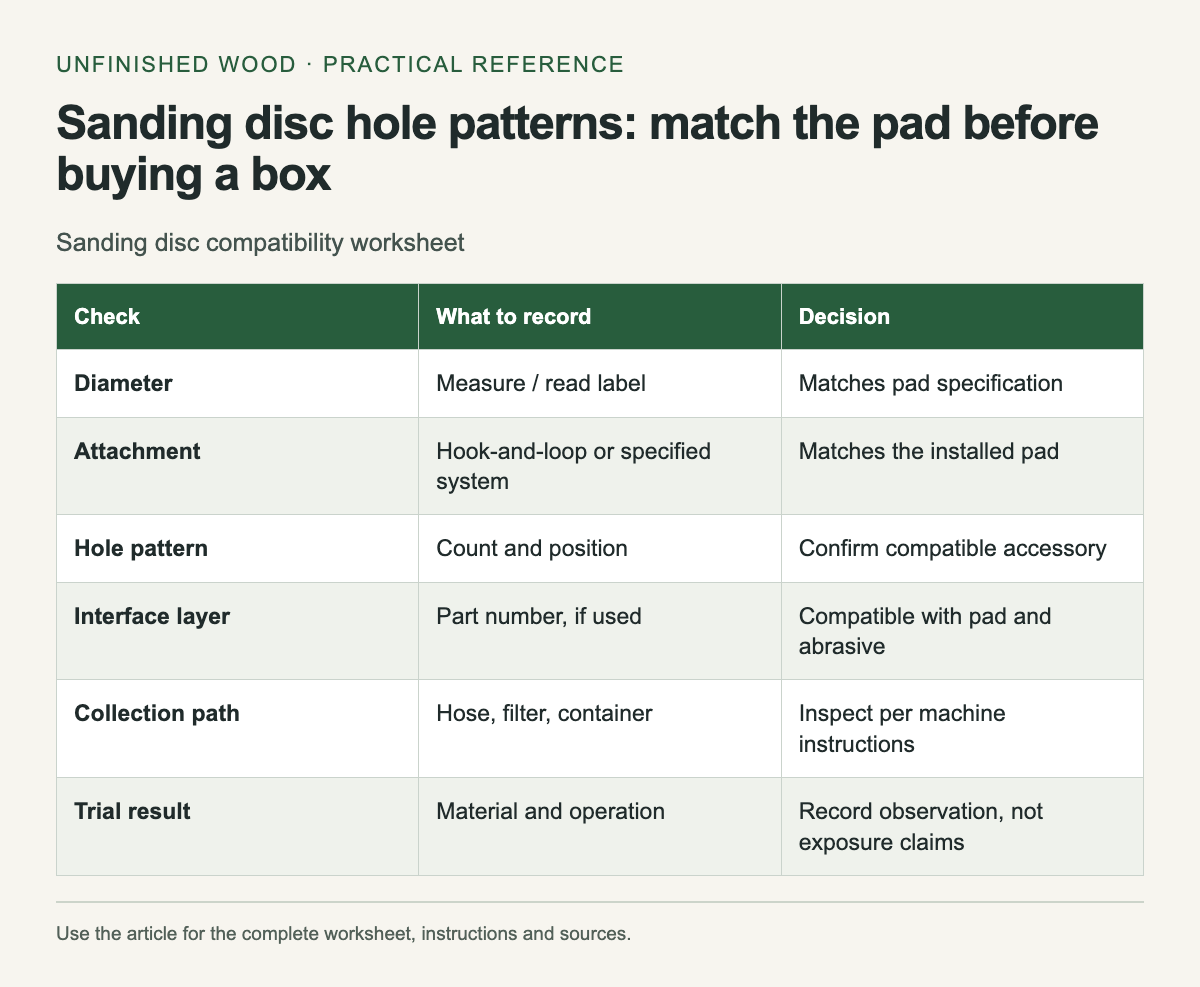
Check the sanding pad's diameter, fastening system and extraction pattern before buying discs. A disc can stick to the pad and still cover important dust openings. The grit number tells you how aggressive the abrasive is; it does not establish whether the disc fits the machine.
Remove the disc with the sander disconnected from power. Find the pad's part number if it has one, then photograph the clean face straight on. Record the sander model as well. A replaced pad may use a different pattern from the one originally supplied with the tool.
Compare the whole pattern
Count holes, but also compare their position and diameter. Two discs with the same hole count may use different circles or center openings. Put a compatible sample disc against the pad without running the tool and inspect how the openings align.
Some systems use mesh abrasives, multi-hole discs or a protective interface pad. Follow the manufacturer’s compatibility instructions for that combination. A dense hole pattern is not proof that every opening underneath will work as intended, and an interface pad adds another layer to check.
Festool's MULTI-JETSTREAM 2 system is one example of a named pad and abrasive airflow arrangement. Use the maker's matching accessory information rather than comparing only disc diameter. This guide does not rank extraction systems or claim a measured collection percentage.
Diagnose poor collection in order
Begin with a fresh, correctly fitted abrasive and a clean pad. Check the hose connection, collection container and filters according to the extractor or sander instructions. A blocked hose can make a correctly aligned disc seem ineffective. A damaged pad can also prevent the disc from lying flat.
Work through one variable at a time. Record the abrasive, pad, extractor arrangement and material being sanded. Compare the same task after correcting an obvious obstruction. Dust remaining on a surface is useful evidence, but it is not a measurement of breathable airborne dust or proof that protective measures are sufficient.
Keep the pad flat where the operation calls for it and avoid pressing hard to make a worn disc cut. Follow the machine instructions for pressure, speed and edge work. Sanding aggressively with one edge of a random orbital pad can change the shape of the part and damage the abrasive attachment surface.
Make a reusable ordering record
Write the exact compatible disc designation on the inside of your abrasive storage box. Add diameter, fastening type, hole pattern or named system, and the pad part number. If you own several sanders, give each row of discs a machine label instead of mixing all discs of the same grit.
Check a small pack before buying a large quantity from an unfamiliar range. Compare the label to the manufacturer's compatibility list and inspect the physical fit. A product photograph can be generic, so use the actual specification and packaging as the purchasing reference.
Know when to replace the pad
Inspect worn hooks, torn edges and distorted backing with the power disconnected. Replace a damaged pad with the correct specified part. Do not drill or punch new holes into a pad or disc unless the manufacturer explicitly provides that procedure.
Use the worksheet to record the setup that fits, then use the site's sandpaper grit guide for the separate choice of abrasive grade. Keep extraction and respiratory protection appropriate to the material and job; an apparently tidy bench does not describe all the dust generated during sanding.
After confirming the disc fits the pad, use the sandpaper grit guide to choose an abrasive for the next stage of the surface preparation.
| Check | What to record | Decision |
|---|---|---|
| Diameter | Measure / read label | Matches pad specification |
| Attachment | Hook-and-loop or specified system | Matches the installed pad |
| Hole pattern | Count and position | Confirm compatible accessory |
| Interface layer | Part number, if used | Compatible with pad and abrasive |
| Collection path | Hose, filter, container | Inspect per machine instructions |
| Trial result | Material and operation | Record observation, not exposure claims |
Related workshop guides
- Sandpaper Grit Guide: What to Use on Wood and Between Finish Coats
- Find sanding scratches before the finish finds them
Comments
Post a Comment