

Two lines on a scrap can reveal a square that needs attention. The awkward part is knowing whether the tool made the error or the scrap did. Before adjusting a saw or trimming a cabinet to match a doubtful square, check how that square repeats against one straight edge.
Give the head somewhere reliable to sit
Choose a flat-faced scrap wide enough for a useful length of line. Its reference edge must be straight over both positions the head will occupy. Check that stretch with a trusted straightedge. A dent, a rounded corner or a lump of dried glue makes a poor reference. If you cannot establish a sound edge, the result will remain uncertain.
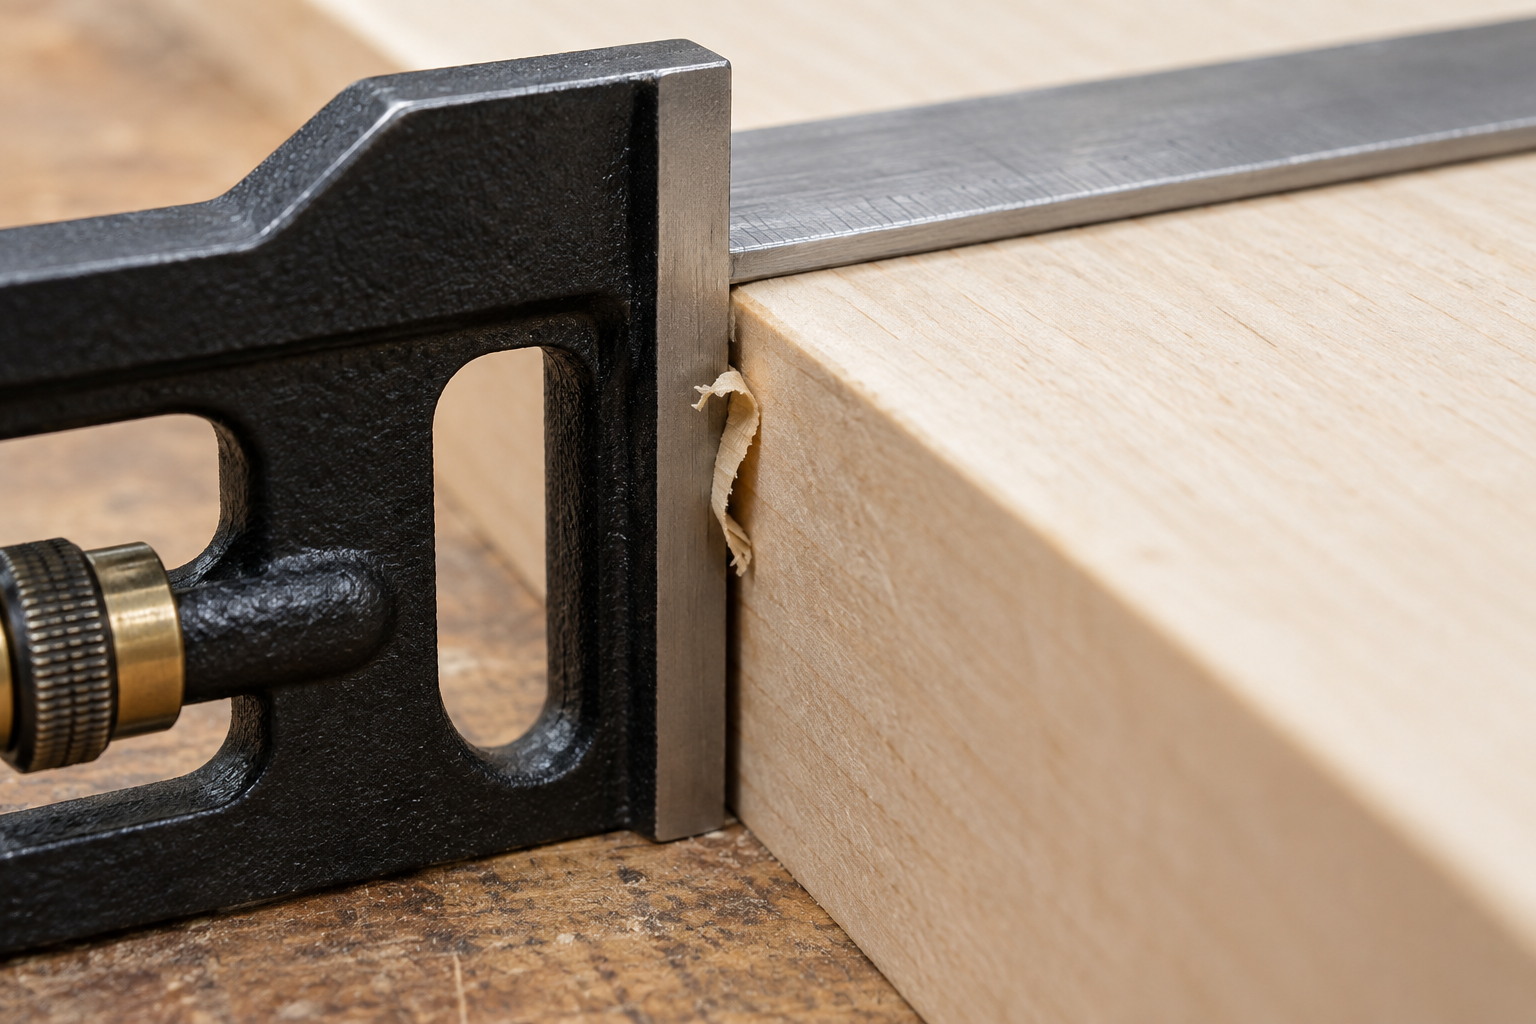
Brush off the board and wipe the square's contact surfaces. Seat the blade correctly and lock it at the extension you intend to use. Starrett's combination-square guide identifies the 90-degree and 45-degree faces; use the 90-degree face for this check. It also warns that irregularities under the tool affect accuracy.
A small shaving trapped against the head is enough reason to stop and clean up. Keep the blade flat on the board and use light, steady pressure against the edge. Forcing a rocking head into place makes the result difficult to repeat.
Reverse the tool against the same edge
Use a sharp pencil and a scrap you can mark freely.
- Seat the head against the reference edge. Draw a fine line along one edge of the blade, beginning at the board edge.
- Turn the square over so the head faces the other way along that same board edge. Keep the blade extension locked. Do not move to the opposite edge of the board.
- Bring the same physical blade edge to the starting point of your first line. Draw the second line with the same pencil angle and pressure.
- Compare the lines near their start and farther out. Repeat on a fresh part of the scrap before deciding what the result means.
If drawing over the first line makes it hard to read, offset the second line slightly. Look for a change in the space between them. A constant separation can simply mean that you started in a different place.
Starrett describes this reversal in its field inspection advice. It specifically cautions that the head sits in different places, making the straightness of the board edge part of the test.
Why the gap counts twice
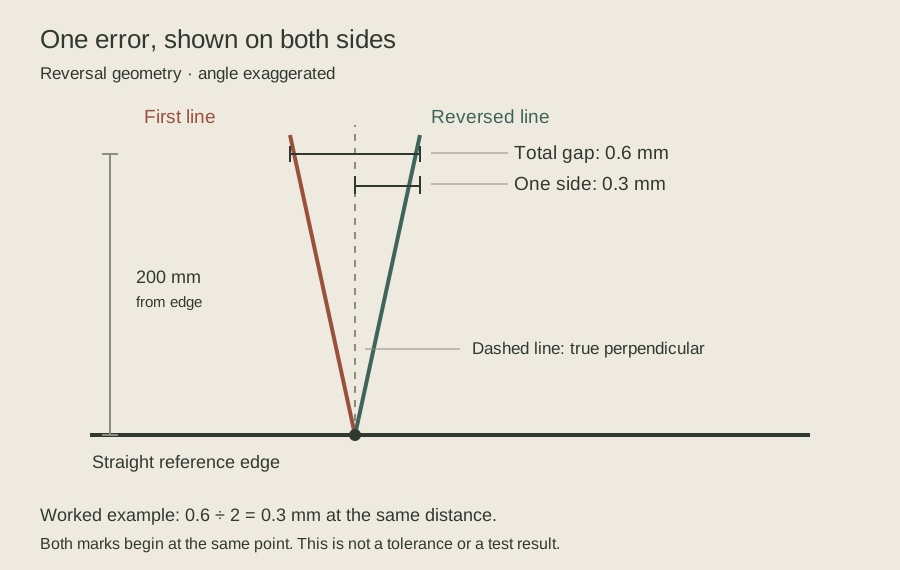
Imagine that the blade leans slightly to one side of a true right angle. After reversal, it leans by the same amount to the other side. The two marks therefore include the error twice.
For lines sharing a starting point, a 0.6 mm separation at a perpendicular distance of 200 mm from the reference edge corresponds to a 0.3 mm sideways error in one marking at that distance. This worked example shows how to interpret the gap; it is not a tolerance for your tool. Lee Valley's square-check instructions use the same divide-by-two principle for a carpenter's square. That product's acceptance tolerance is not a specification for your combination square.
For offset lines, use the change in their signed separation between two distances, then halve it. Measuring only the final gap would count the initial offset as an error. If the pencil marks overlap or their edges are fuzzy, record that you cannot resolve a gap. Extra decimal places will not recover detail the marks do not contain; our guide to false precision explains that problem in everyday measuring.
What to do with the result
| What you see | Next check |
|---|---|
| Lines coincide within the width of the marks | Record the tested extension and line length. This check has not revealed an error at that resolution. |
| A repeatable wedge opens between the lines | Clean and reseat the tool, confirm the reference edge, then repeat. If it persists, seek an independent check or manufacturer service. |
| The gap changes each time | Look for rocking, debris, a loose blade or inconsistent marking before blaming the tool's angle. |
| Lines stay evenly separated | Check their starting positions. Parallel offset marks do not by themselves show an angular error. |
Do not file the head or bend the blade on the strength of one pencil test. Until you have resolved a repeatable discrepancy, use a verified square for critical layout. A successful 90-degree check also says nothing about the 45-degree face, the bubble level or the accuracy of the rule graduations.
Once the tool is trustworthy enough for the job, check the work itself. A square resting at one cabinet corner cannot describe the whole assembly; compare its diagonals before trimming the door.


Comments
Post a Comment