An independent woodworking journalMake something worth keeping.
Good wood.
Useful knowledge.
A little patience.
The Wood Journal

How to Choose Wood for Spoon Carving

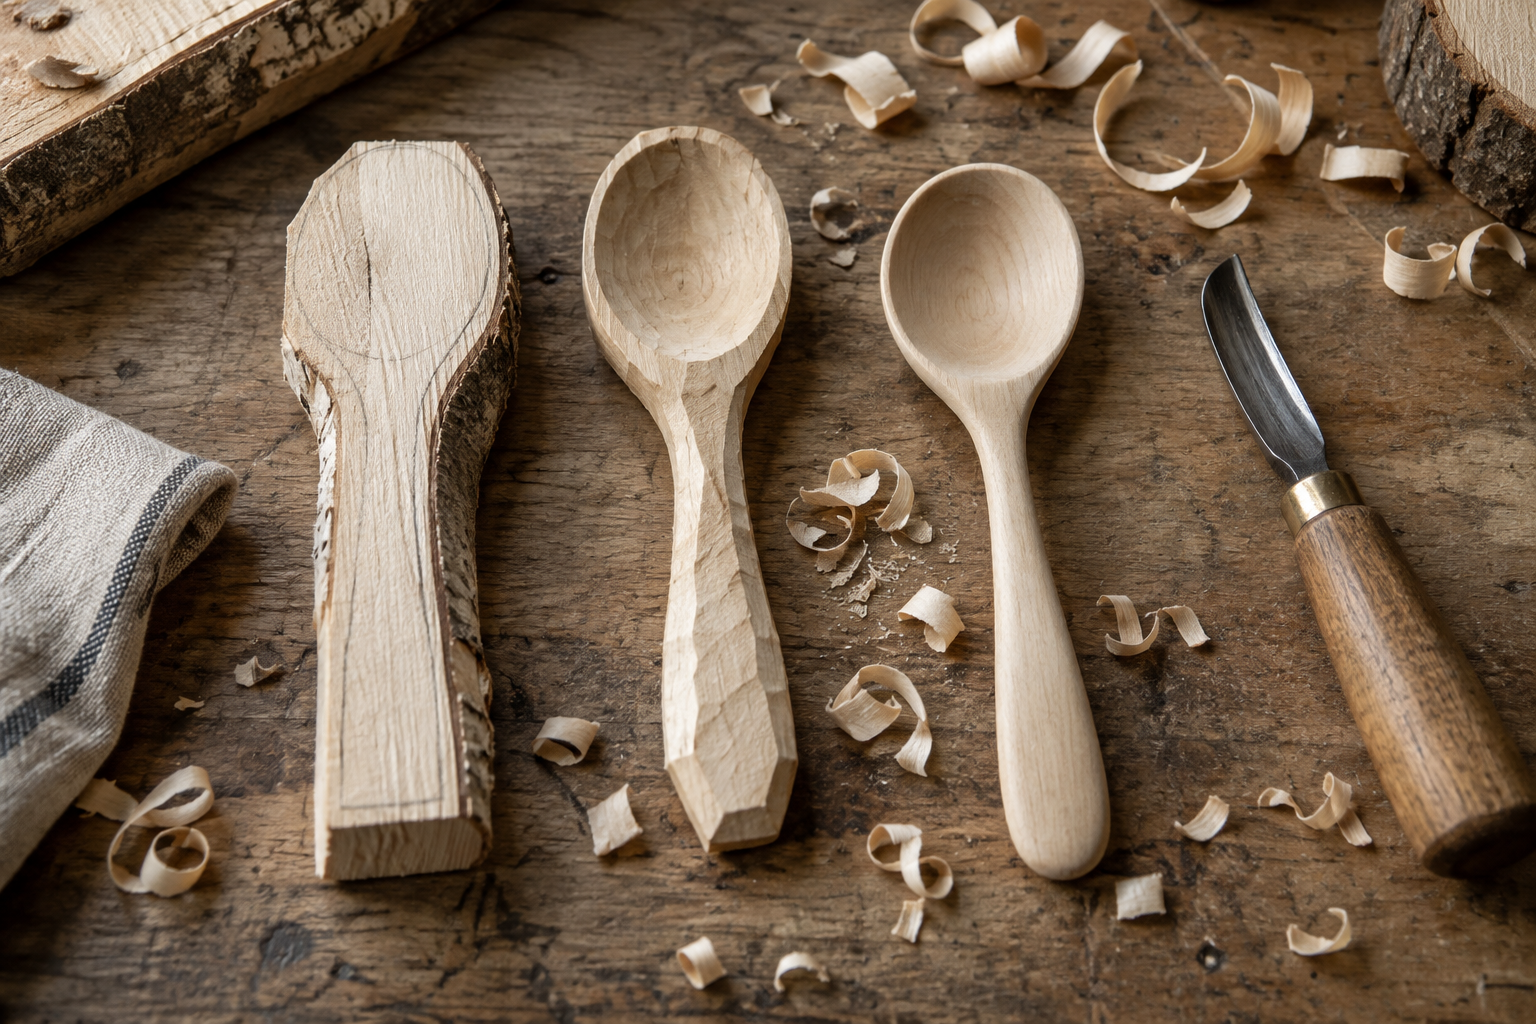
Spoon blanks and completed spoons beside carving tools
Read the grain through the bowl and handle before carving.

A spoon handle is narrow, so grain direction becomes part of the design. If the fibers run diagonally out through the neck, an attractive blank can leave a weak connection between bowl and handle. Inspect the blank in more than one view before drawing the spoon.

Start with known, suitable wood

Use an identified species appropriate to utensils, from a clean source. Avoid treated lumber, unknown salvaged wood and branches with decay. Some carvers work green wood because it cuts more readily, but that also introduces drying and distortion to the process.

Blank featureWhat to do
Grain running continuously along the handleUse it to guide the spoon's long axis
Pith through the bowl or handleSelect another part of the blank
Check approaching the neckMove the pattern or reject the blank
Knot at a thin transitionAvoid it for an early project
Curved grainConsider whether the shape can follow it without weak runout

Draw the side profile too

A top-view outline hides changes in thickness. Draw the bowl depth, handle thickness and transition on the side. Leave extra material around the neck while roughing out. A dramatic scoop cut that looks harmless from above can remove the fibers the handle needs.

For a first spoon, use a broad, simple bowl and a comfortable handle rather than a very thin elegant profile. Final thickness depends on the species, grain and form; a single number should not replace inspection of the piece.

Keep cuts and holding separate

Secure the work for hollowing and use carving tools suited to the operation. Keep the other hand outside the blade's possible path, including the path if a chip releases unexpectedly. Change the holding arrangement as the blank becomes smaller.

If working green, plan a gradual drying process appropriate to the wood and workshop rather than placing the spoon on a heater. Inspect for checks and distortion before final smoothing.

Decide what touches food

Follow the chosen finish manufacturer's directions for utensil use and full cure. Decorative oils and unidentified finishes are not substitutes for a documented food-contact application. Do not use the spoon if a crack traps residue or the neck is compromised.

Keep the first blank's offcut. It provides somewhere to test a finish and helps you understand how the wood behaved as it dried.

Related workshop guides

References and further reading

Owen Mercer
Tools & workshop practice

Owen Mercer

Workshop notes on hand tools, joinery, jigs and the small habits that make a project easier.

Comments

Popular posts from this blog

Lumber Grades At A Glance

Illustrative AI-generated image. Domestic hardwood lumber found at sawmills meets different quality levels or grades as specified by the National Hardwood Lumber Association (NHLA). The basis for this wood grading is the number and size of defect-free clear cuttings in a board, as summarized below, Thickness is not a consideration, though with some species worm holes, gum pockets, and stain are acceptable. FAS (First & Seconds) lumber grade. This premium grade represents the finest lumber yield in a log. Generally, the minimum size board is 6" wide by 8' long which yields a minimum of 83 1/3% clear cuttings on its poorest face. F1F (FAS One Face) lumber grade. The best face grades as clear FAS; the worst, as #1 common, containing some knots. Selects lumber grade. Close to a FAS board. A Select board must be a minimum of 4" wide and 6' long and yield a minimum of 83 1/3% clear cuttings, but only on one face with #1 common on the worst face. #...

4-Step Antique Finish

Create a fool-the-eye timeworn look. Some projects, like wine server for your wood cabinet, are not unlike a pair of blue jeans, Both look better after a few years of regular use. To create that well-worn look wood finish, I have come up with a finishing schedule that can add a century's worth of character in less time than it would take to stonewash a new pair of Levis. At first glance, this four-step finish might appear demanding, bur keep reading. As you'll soon learn, this special finish amounts to little more than a combination of a few basic techniques you've probably used before. The “pickling" and - “highlighting” I use aren't much different than whitewashing a fence. Simply brush on the color and then wipe some off until it looks good to you. And after each step you'll apply a quick-drying seal coat to save your work. Besides providing an additional decorative element to your work, antiquing has some practical advantages. Adding color to t...

How to buy Sawmill Hardwood and Save (Part 1)

Illustrative AI-generated image. When you visit a home center to purchase hardwood lumber, more than likely you'll encounter limited quantities, limited species, and through-the-roof pricing. In some cases, you're paying for that shiny cellophane wrapper. Before you sell your tools and steer toward a different hobby, you need to check out the benefits of shopping at a lumber sawmill. While some mills service only the commercial building industry. make pallets, or ship woods overseas, many gladly sell to the local woodworker. Here is where you'll find great variety and huge savings. If the special lingo and ways in which sawmills sell hardwood have kept you at bay, let us help you shop like a pro. First things first: finding a sawmill. While your local yellow pages will yield results when you look under "Sawmills” or “Lumber-Retail," members of 10 cal woodworking clubs, woodworking friends, or woodworking specialty stores may serve as better sources for locati...

It starts with
a piece of wood.

Unfinished Wood is a collection of practical ideas for the workshop: choosing your materials, solving small problems, and bringing out the character in what you make.

The journal voices

Owen Mercer
Tools & workshop practice

Owen Mercer

Workshop notes on hand tools, joinery, jigs and the small habits that make a project easier.

Ben Harlow
Wood & materials

Ben Harlow

Practical guides to choosing lumber, understanding grain and planning for wood movement.

Daniel Reed
Surface & finish

Daniel Reed

Notes on sanding, test samples, color and finishes that let the character of the wood show through.

Search This Blog