
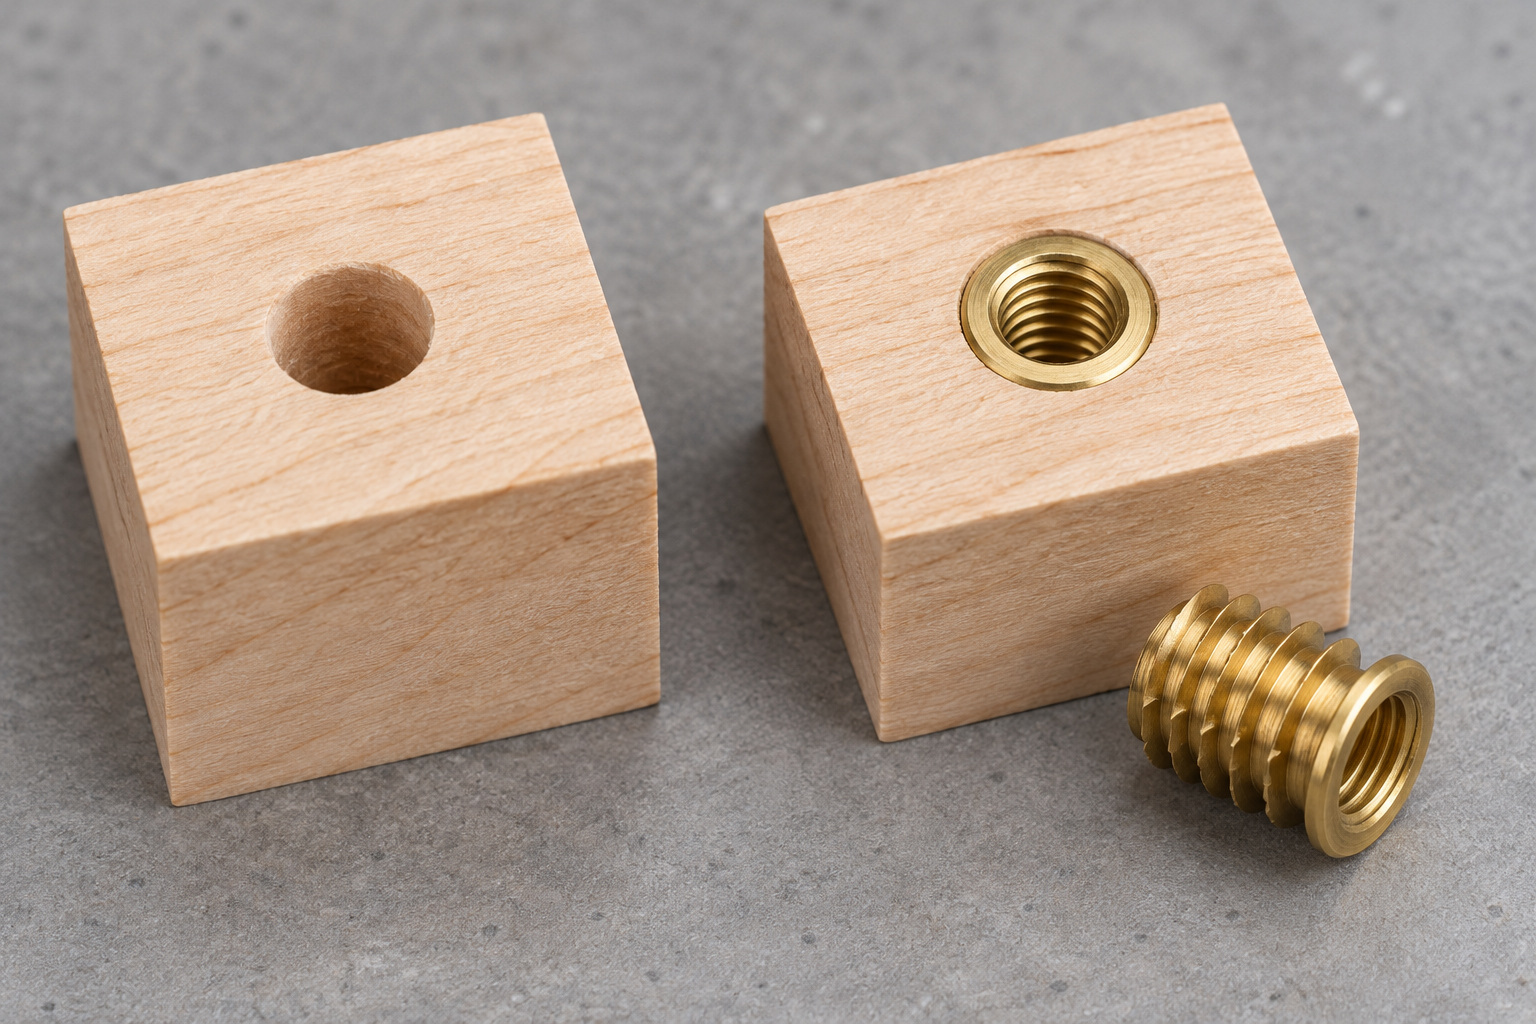
A threaded insert goes in square when the pilot hole is square, the driver stays on that axis and the insert can cut its external thread without excessive force. Increasing torque will not straighten a tilted start. Make the first installation in an offcut of the same hardwood, using the exact insert and drill bit intended for the project.

1. Match the insert to the wood and joint
Choose an insert sold for hardwood, with the machine thread your bolt requires. An M6 bolt and a 1/4-20 bolt are not interchangeable even if they appear similar. Check the specified hole diameter, insert length and installation tool against the actual product number. Different outside-thread designs can share the same internal thread but need different holes.
The E-Z LOK installation overview separates hardwood knife-thread inserts from its softwood products. Its wood-insert data sheets are a useful starting point for dimensions. This is a fastening method, not a load rating for your finished joint: thin edges, short grain and poor bolt geometry can still fail.
Threaded insert drill sizes: match the exact part
The bolt thread identifies the inside of the insert. The bore in the wood must fit its outside thread. For example, two inserts accepting a 1/4–20 bolt can require different drills because their bodies and intended substrates differ.
| E-Z LOK part | Family / intended wood | Internal bolt thread | Listed drill |
|---|---|---|---|
| 400-4 | Brass E-Z Knife / hardwood | 1/4–20 | 25/64 in |
| 400-M6 | Brass E-Z Knife / hardwood | M6 × 1.0 | 25/64 in |
| 400-M8 | Brass E-Z Knife / hardwood | M8 × 1.25 | 33/64 in |
| 801420-13 | Flush E-Z Hex / softwood | 1/4–20 | 23/64 in |
Source: E-Z LOK drill chart. These are starting specifications for these exact parts, not a universal M6 or 1/4-inch insert chart. Test in matching scrap and follow the maker's hardwood guidance before changing the hole size. Do not select the softwood row simply because its drill is already in your kit.
2. Make a realistic test piece
Use a scrap with the same thickness and grain orientation as the installation area. A trial in pine does not prove the fit in hard maple. Put the trial hole far enough from an end to avoid an accidental split, then make another representative trial if the real location is close to an edge.
Write the bit size beside each test. Change one variable at a time so you can tell whether a smoother installation came from a changed diameter, a better driver or a corrected drilling angle. If the test cracks, strip out the insert and inspect the damaged area rather than calling a tight fit a successful result.

3. Drill perpendicular and control depth
Clamp the work securely. A drill press makes it easier to control the axis, but confirm its table is square to the bit. For a large panel, use a suitable drill guide supported flat on the reference face. Mark all locations from one consistent reference, and check the mounting part over those marks before drilling.
Set a physical depth stop for a blind hole. Account for the drill point, not just the straight-sided portion. The hole must accommodate the insert and any required extra clearance without breaking through the opposite face. Remove chips so they do not occupy the space intended for the insert or bolt.
4. Start slowly with full engagement
Use the maker's driver or its approved bolt-and-jam-nut method. For E-Z Knife inserts, the manufacturer describes both options in its hardwood installation instructions. For this E-Z Knife family, the slotted end normally faces up when using the matching drive tool; the maker permits either orientation with a bolt and jam nuts. This is a product-specific instruction, not a rule for every brand.
Turn by hand for a controlled start. Watch the driver against a small square in two directions. Stop as soon as the insert visibly leans or resistance rises abruptly. Back it out, inspect the entry and return to the test piece. Avoid using an impact driver to force a questionable hole.

5. Diagnose resistance before enlarging the project hole
| Symptom | Likely check | Next move |
|---|---|---|
| Insert leans on its first turns | Driver angle or damaged entry | Restart on a test hole; confirm the drilling guide. |
| Heavy resistance throughout | Wrong insert family or unsuitable bore | Consult the product chart and repeat the scrap test. |
| Insert turns without holding | Oversize or damaged hole | Do not rely on more tightening; revise the repair. |
| Bolt binds after installation | Cross-threading, chips or tilted axis | Remove the bolt and inspect before assembly. |
| Bolt tight, bracket loose | Bolt bottoming before clamping | Check effective bolt reach and available depth. |
Seat the insert to the maker's specified position. Release the jam nuts before removing a bolt driver so you do not unwind the insert. Test the final bolt by hand, then trial-assemble the mating part. Where the starting problem is simply an ordinary screw that has lost its grip, compare a conventional stripped-hole repair before enlarging the hole for different hardware. For repeated mounting positions, use the same template checks used for cabinet hardware to catch a mirrored or shifted layout.
Before fitting the finished part
- Confirm the insert part number and the matching bolt thread.
- Check the drilled axis from two directions, not only from the front.
- Verify usable hole depth, including the drill point and bolt clearance.
- Seat the insert as specified without a split or raised ridge around the hole.
- Run the bolt in by hand before attaching the mating part.
- Confirm that the bolt clamps the part before it reaches the hole bottom.
Measure the actual board thickness before choosing insert length; the nominal lumber label is not enough to establish the available depth.


Comments
Post a Comment